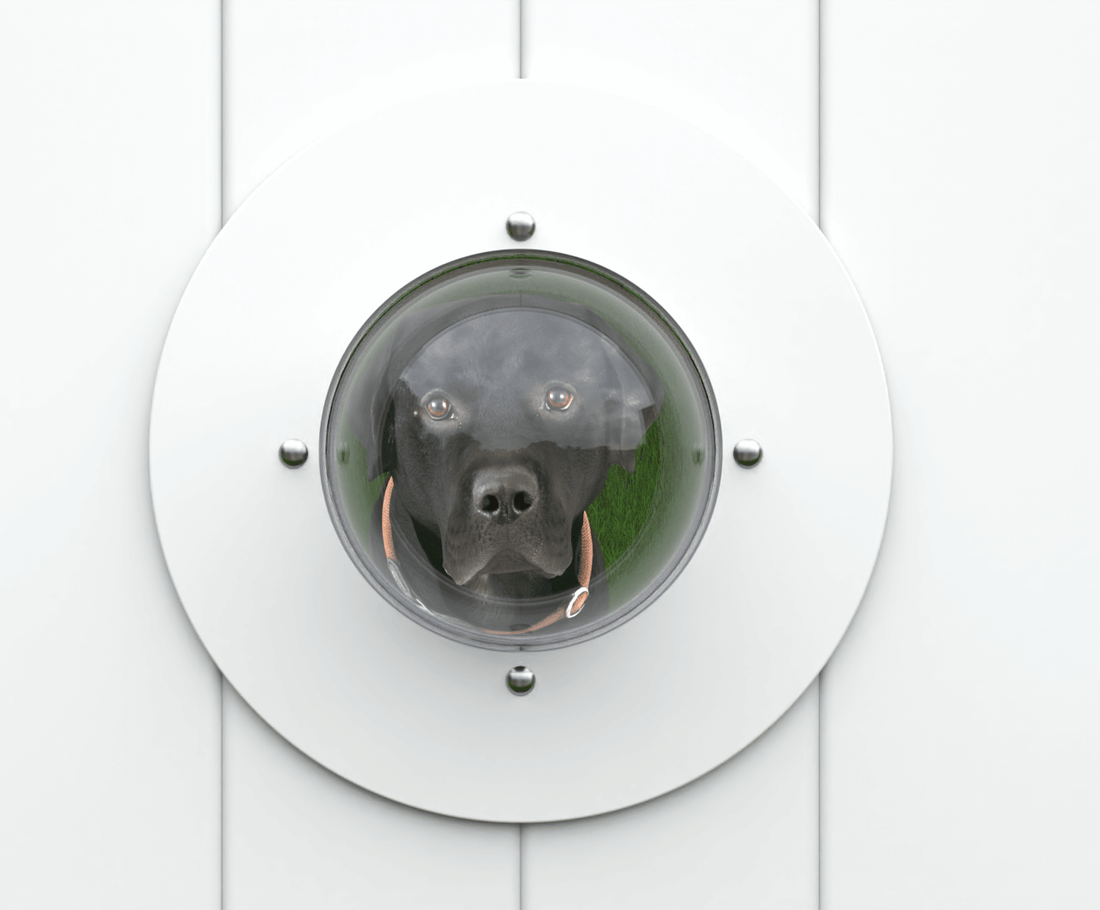
How to Install an Acrylic Dome Dog Window for Your Vinyl Fence
For pet owners looking to enrich their furry friends' lives and enhance their backyard, installing an Acrylic Dome Dog Window in your vinyl fence can be a wonderful addition. This innovative product is currently the only kit specifically designed for vinyl fences available on the market, offering a clear view for your pet to observe the world beyond the confines of the backyard.
Step-by-Step Installation Guide
Before you begin the installation, it’s essential to gather the right tools and understand the process thoroughly. Here's a detailed guide to help you install your Acrylic Dome Dog Window, complete with imagery for each step to ensure you can follow along easily.
Tools and Supplies Needed:
- 10 mm wrench
- Reciprocating saw or oscillating tool
- Tape measure
- Square
- Exterior PVC or plastic rated spray paint
- 220-grit sandpaper
- Damp rag

STEP 1: Choose the Location
First, determine the best location for the window based on your dog's height. It’s important that the window is easily accessible and at the right level for your dog to look through comfortably.

STEP 2: Cut the Fence
Using a reciprocating saw or an oscillating tool, carefully cut out the marked 11-inch by 11-inch square. Ensure your cuts are straight and clean to prepare for a smooth installation.

STEP 3: Paint the Brackets
Before attaching anything to your fence, prepare the brackets that will hold the window in place. Lightly sand the exterior surfaces of the brackets using 220-grit sandpaper, then wipe them down with a damp rag. Allow them to dry for 20 to 30 minutes. Next, spray paint the brackets with a color that matches your fence. Apply at least two coats for a durable finish.

STEP 4: Install the Brackets
Note: This step requires two people. Position one bracket on the outside of the fence and the other on the inside. Carefully align and snap the two brackets together.

STEP 5: Attach the Dome
Place the dome into the bracket and align the first hole of the dome with the bracket. Carefully drill through to ensure the holes are perfectly aligned.

STEP 6: Insert the First Bolt
Insert the bolt provided with your kit from the exterior side of the fence through the aligned holes.

STEP 7: Secure the Nut
Insert the bolt provided with your kit from the exterior side of the fence through the aligned holes.

STEP 8: Apply the Cap Nut
After securing the nut, cover it with the cap nut to ensure a clean and safe finish on the interior side.

STEP 9: Complete the Installation
Repeat Steps 5 through 8 for each hole in the dome until all are securely fastened and the installation is complete.

With your new Acrylic Dome Dog Window installed, your pet can now enjoy a new view and more engaging surroundings. This easy-to-follow guide should help you install the window efficiently, giving your pet a little extra joy in their daily life. Enjoy watching your furry friend explore their new window to the world!
